Answers and support for DuraMax storage sheds, fencing, installation, maintenance, warranties and replacement parts.
DuraMax Product Support
Find answers quickly
Search common questions about DuraMax storage sheds, fencing, installation, maintenance, warranties and product support.
119answers available
Quick answers
Start with a common question
Browse by product
Narrow by need
Assembly time varies significantly by product series, size, foundation, site preparation and accessories. Most full-size sheds are best assembled by at least two people. Review the installation manual before starting and allow additional time for foundation work, anchoring and optional accessories.
Start with a flat, level and properly drained site. Depending on the shed, the base may be a concrete pad, a suitable wood platform, an optional steel foundation kit or another model-specific foundation system. Follow the installation manual for the exact product before preparing the site.
Foundation requirements vary by product. Many sheds require a flat, level base, and some models can use an optional galvanized steel foundation kit to support a plywood floor. Other models use different floor or foundation systems. Check the manual for the exact shed you are installing; plywood and anchoring materials are generally not included unless specifically stated.
DuraMax warranty coverage varies by product. Vinyl storage sheds generally carry a 15-year limited warranty, while DuraMax vinyl fencing generally carries a 25-year limited warranty. Please review the warranty for your specific product for coverage terms, conditions and exclusions.
Delivery options depend on the retailer, dealer and product. Many products can be shipped to a residential or commercial address, while oversized items may arrive by freight carrier and may involve liftgate, tailgate or other delivery charges. Confirm the delivery method and any fees with the seller before ordering.
DuraMax offers storage sheds in a wide range of widths and depths, from compact side-yard and vertical storage models to larger backyard sheds and buildings. The current lineup changes over time, so use the Storage Solutions section to compare available sizes and exact exterior dimensions.
Materials vary by DuraMax product line. Many vinyl sheds use rigid PVC wall panels with metal reinforcement, while other DuraMax storage products may use resin/polypropylene, galvanized steel or insulated panel construction. See the specifications for your exact model for its material and structural details.
Window availability varies by model. Some sheds include windows, while other models may accept an optional window kit sold separately. Check the product page and installation manual for your specific shed before purchasing an accessory window.
Shelves and hanging accessories are not standard equipment on every DuraMax shed. Included features and compatible accessories vary by model. Check the product page for included contents and use only shelving or hooks appropriate for the shed construction and load.
DuraMax sheds are designed to resist normal weather when assembled, anchored and sealed according to the installation manual. Proper site drainage, a level base and any model-specific sealant steps are important for helping prevent water intrusion. Always follow the manual for your exact model.
Many DuraMax sheds can be installed on a properly sized, flat and level concrete pad. The pad still needs to meet the model-specific dimensions, anchoring and drainage requirements shown in the installation manual.
Floor construction varies by product. Some smaller storage products include an integrated floor, while many larger sheds require a prepared base, foundation and/or separate flooring material. Check the product specifications and installation manual for the exact model.
Shelving options depend on the shed construction and the weight you plan to store. Use only compatible attachment points and avoid overloading wall panels or structural members. For heavier items, floor-supported freestanding shelving is often the better approach. Refer to the manual or contact DuraMax Support for your model.
Available colors and finishes vary by product line and model. DuraMax products are offered in several neutral, woodgrain and darker finishes depending on the series. Check the individual product page for the current color options for the model you are considering.
Vinyl/PVC sheds are popular for their low-maintenance surfaces and resistance to corrosion, while metal sheds offer a different combination of construction, appearance and value. The best choice depends on your climate, size requirements, desired features and maintenance preferences. Compare the specifications of the individual models rather than choosing by material alone.
Painting is generally not recommended for DuraMax vinyl/PVC sheds because the factory finish is designed to be low maintenance. If you are considering paint, first confirm the material and recommendations for your specific model with DuraMax Support and use only a coating compatible with that material.
Door position, swing direction and side-yard installation options vary by model. Review the product images, dimensional drawings and installation manual for the specific 4-foot-wide shed before ordering so you can confirm the door will face the direction you need.
No. Window kits are not universal across every DuraMax shed. Compatibility depends on the product series, shed size and wall-panel design. Use the accessory information and installation manual for your exact model.
The number of compatible windows depends on the shed series, size and wall-panel layout. On models that accept accessory windows, they must be installed only in approved panel locations. Check the product-specific manual or contact DuraMax Support before cutting any wall panel.
DuraMax products are generally supplied as ready-to-assemble kits. Installation or assembly services may be available through certain retailers, dealers or local contractors, but availability varies by location and seller. Confirm assembly options with the retailer when purchasing.
Many DuraMax sheds can be disassembled and rebuilt, but the process depends on the model, age and condition of the components. Some fasteners, plugs, washers or other small parts may need to be replaced during reassembly. Keep the original installation manual and label parts carefully during disassembly.
DuraMax offers outdoor storage products in several constructions and sizes, including vinyl/PVC, resin, metal and insulated models. Features, materials, wind and snow ratings, floor systems and warranty terms vary by product, so compare the specifications for the exact model you are considering.
Manufacturing location varies by product and may change as product lines evolve. Please check the product specifications, packaging or contact DuraMax Support if you need the country of origin for a specific model.
Vinyl fencing is made primarily from polyvinyl chloride, or PVC, combined with other ingredients selected for properties such as impact strength, color and outdoor durability. Exterior PVC formulations can include pigments and UV stabilizers to help the material perform in sunlight. The exact construction and formulation vary by fence profile and product specification.
Vinyl fencing is designed to be low maintenance and generally does not require painting or staining. Periodic washing with water and a mild detergent, along with an occasional inspection of gates, hardware and posts, will help keep the system in good condition.
Surface dirt, organic residue, mold or mildew can develop on exterior products depending on moisture and local conditions. On vinyl fencing, begin with water and a mild detergent using a soft cloth or brush. Avoid harsh solvents or abrasive cleaning methods unless specifically approved for the product.
Individual fence components can often be repaired or replaced if they are damaged. For routine cleaning, start with water and a mild household detergent and avoid aggressive solvents, abrasives or pressure settings that could damage the surface. Contact your DuraMax dealer or support team if a post, rail, picket or panel needs replacement.
Post-setting requirements depend on the fence system, fence height, soil conditions, climate and local code. Many installations use concrete around the posts, but the required footing dimensions and reinforcement should follow the installation instructions and local requirements for your project.
Gates can be incorporated into many DuraMax fence systems using compatible profiles, hardware and reinforcement. Gate width, weight and hinge/post requirements matter, so have the gate configuration confirmed by your dealer or installer before fabrication.
Vinyl fencing is available in multiple heights, but the appropriate maximum height depends on the specific fence system, post spacing, reinforcement, wind exposure and local building or zoning requirements. Taller installations may require additional reinforcement or engineered details.
DuraMax fence components can support a variety of layouts and styles, but available customization depends on the profiles, colors and accessories offered for the particular system. Your dealer or installer can help determine which combinations are practical and code-compliant for your project.
Weather performance depends on the specific fence system and, especially, correct installation. Post depth, concrete footings, spacing, reinforcement and site wind conditions all affect performance. DuraMax vinyl fencing is formulated for exterior use and does not rust, but no fence should be treated as having unlimited wind or weather resistance. Follow the installation requirements for the selected system and local conditions.
Do not assume a vinyl fence system can be used as a code-required guardrail, porch rail or balcony guard. Those applications may have specific structural, height, spacing and load requirements. Use only a railing or guard system that is designed and approved for that application, and confirm requirements with the local building authority before installation.
Warranty coverage for DuraMax fencing depends on the specific product and the warranty terms in effect for that system. Review the applicable warranty document for coverage period, limitations, exclusions and claim requirements.
Vinyl fencing is designed for long-term outdoor service, but actual service life and appearance depend on installation quality, climate, exposure, impact and maintenance. Following the installation and care recommendations for the specific fence system will help maximize its useful life.
Up-front cost varies by fence style, height, reinforcement, labor and local market conditions. Vinyl may cost more or less than wood or metal depending on the project, but it can reduce ongoing maintenance because it generally does not require routine painting or staining. Compare installed cost and expected maintenance over the time you plan to own the property.
Titanium dioxide, commonly written as TiO2, is a white pigment used in many products, including PVC. In exterior vinyl applications it can contribute opacity, color stability and resistance to the effects of ultraviolet light. The exact formulation and amount used can vary by product and manufacturing specification.
DuraMax vinyl fencing is designed as a low-maintenance outdoor fencing system using rigid PVC components formulated for exterior exposure. Depending on the profile and system, features may include co-extruded surfaces, UV stabilizers, routed-and-interlocked components and reinforced posts or rails.
Available profiles, colors, reinforcement and installation requirements vary by fence style. Review the specifications for the system you are considering and work with an experienced dealer or installer when planning a project.
California Proposition 65 requires businesses to provide a clear and reasonable warning before knowingly and intentionally exposing people to a listed chemical unless the exposure is low enough that a warning is not required. A Proposition 65 warning does not by itself mean that a product is unsafe or violates a product-safety standard.
Warning requirements depend on the chemicals and level of exposure associated with a particular product. DuraMax provides Proposition 65 warnings where applicable to help California customers make informed decisions.
Shed names such as 8×6 or 10×8 are usually size categories and may not match the exact exterior, interior or foundation dimensions. For site planning, setbacks, foundations and equipment fit, use the product-specific dimensional drawing or specification sheet rather than the nominal size alone.
It depends on the shed construction. Vinyl/PVC and resin components do not rust like steel or rot like wood, while metal components can require protection from prolonged moisture or corrosive conditions. Termites do not consume vinyl, resin or metal, but wood flooring, platforms or stored materials can still be vulnerable. Check the material specifications for your exact shed and keep the foundation area dry and well maintained.
Do not cut or modify the roof unless the product instructions specifically provide for an approved accessory or modification. Unapproved openings can affect weather resistance, drainage and structural performance. Use only accessories intended for the shed series and follow the installation instructions for the exact model.
Electrical additions may be possible, but they are not part of the standard shed installation and must comply with local electrical and building codes. Use a qualified electrician where required and avoid cutting, drilling or loading structural components unless the product instructions specifically allow it. Plan any electrical work so weather sealing, ventilation and the shed structure are not compromised.
Gutter options depend on the shed design. Do not drill into or modify roof panels, fascia or structural members unless the model instructions specifically allow it. If you are considering an aftermarket gutter system, keep it lightweight, avoid interfering with roof drainage or ventilation and confirm that the attachment method will not damage the shed.
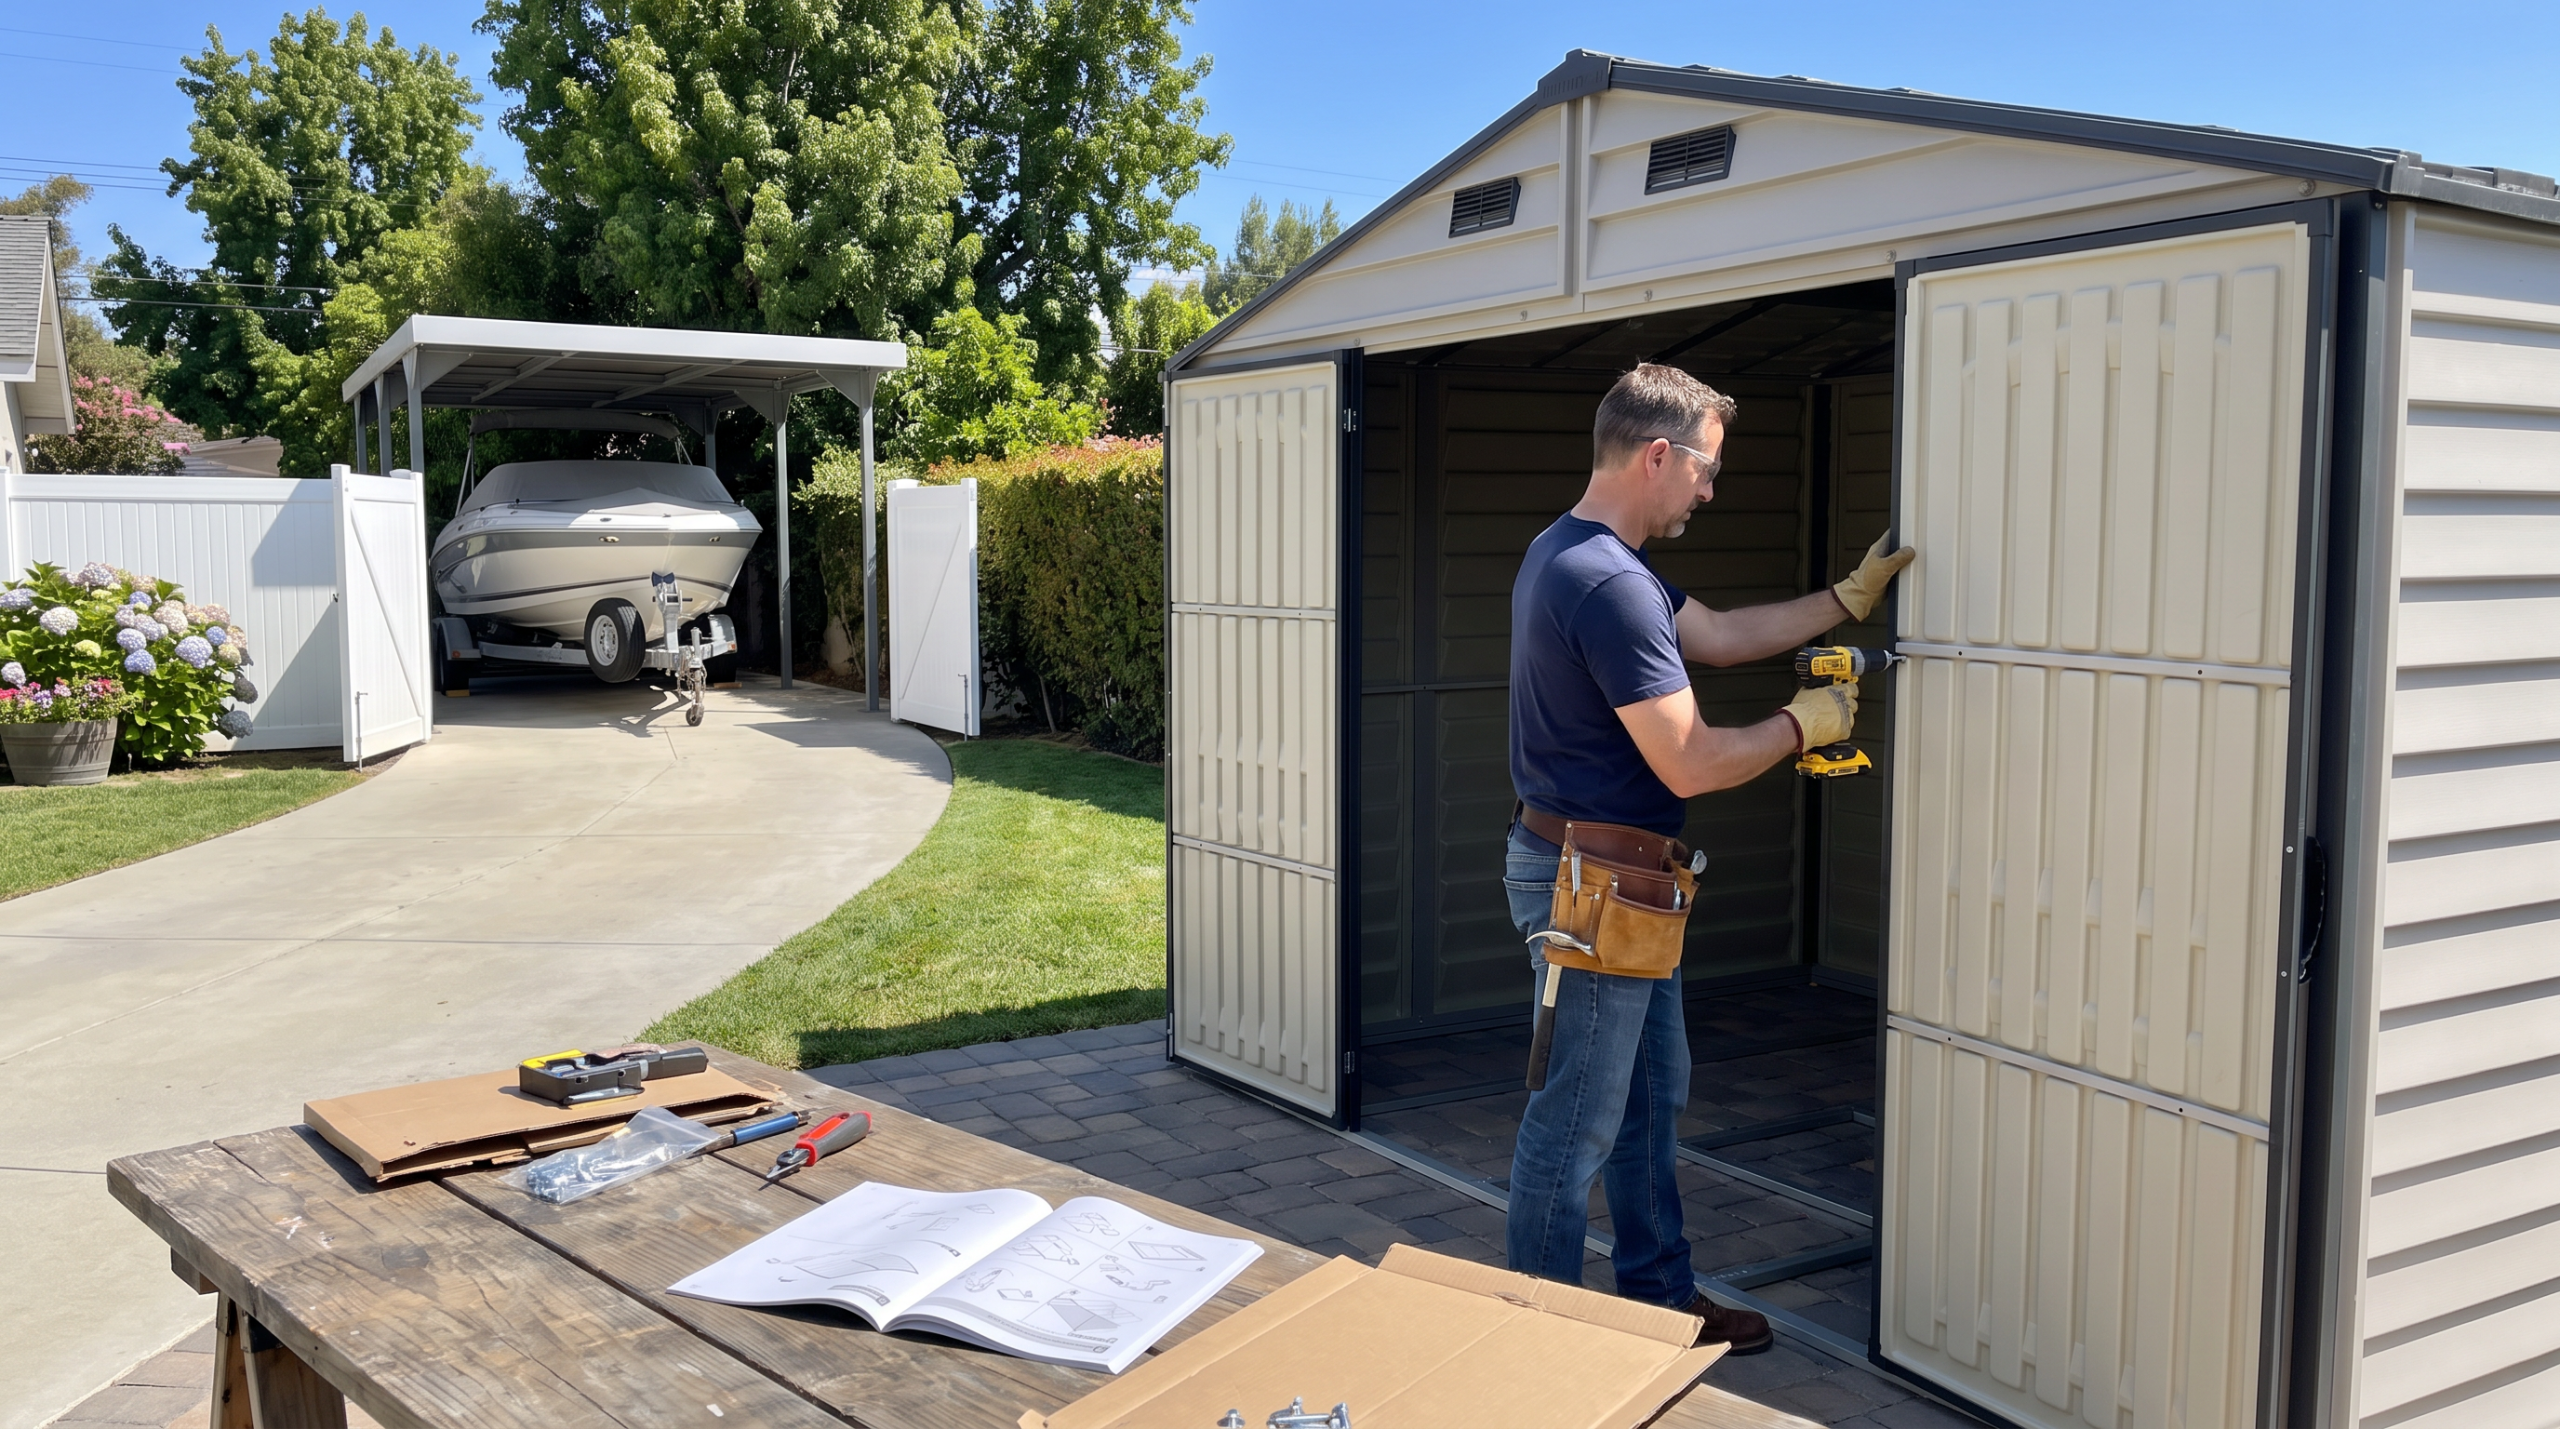
Most full-size sheds are easier and safer to assemble with at least two people, and larger models may require additional help for wall panels, roof sections or doors. The exact recommendation depends on the model. Review the installation manual before starting and plan for enough helpers to safely lift, align and hold components during assembly.
Assembly is possible in many weather conditions, but cold temperatures, snow, ice and wind can make installation more difficult and less safe. Work on a clear, stable site, keep parts dry, and follow any temperature limits for sealants or adhesives used with the model. Avoid assembling during severe weather or when panels, ladders or footing surfaces are icy or unsafe.
Many shed installations can take more than one day depending on the model, site preparation and number of helpers. Follow the assembly sequence in the manual and protect all parts from moisture and damage between work periods. A partially assembled shed can be vulnerable to wind, so do not leave unsupported walls, roof sections or other incomplete assemblies exposed contrary to the instructions.
It is generally best to assemble the shed on its final prepared foundation. A fully or partially assembled shed can be difficult to move without twisting or damaging panels, doors, fasteners or the frame. If relocation is necessary, follow any model-specific instructions and consider disassembling the shed rather than attempting to move it as one piece.
Do not attach a DuraMax shed to a house, fence or other structure unless the product instructions specifically allow it. The shed is designed to be installed as its own structure on the required base and anchoring system. Improvised attachments can transfer loads, interfere with movement and drainage, or create code and warranty issues. If you need a connected structure, confirm the design with DuraMax Support and your local building authority before proceeding.
Pavers or patio blocks may be suitable only if they create a flat, level, stable and fully supported base that meets the foundation requirements for your specific shed. Loose, uneven or settling pavers can cause alignment and door-operation problems. Check the installation manual before choosing this type of base, and make sure drainage and anchoring can still be handled correctly.
Do not drill into wall panels or structural components unless the product instructions or an approved accessory specifically allow it. Unapproved holes can affect strength, weather resistance and appearance. Use model-compatible accessories, approved attachment points or floor-supported storage when possible, and check the installation manual before making any permanent modification.
Replacement-part availability depends on the shed model, age and the part needed. Keep your model number, purchase information and installation manual with your records. When requesting a part, provide the model number and, if possible, the part number or a clear photo. DuraMax Support can confirm current availability and help identify the correct component.
Many DuraMax sheds are designed for outdoor use, but coastal and high-humidity environments can be more demanding because of salt air, moisture and wind exposure. Check the materials, hardware, wind rating and maintenance guidance for the exact model. Rinse salt residue from exterior surfaces and metal components as needed, maintain good drainage and anchoring, and follow any additional local code requirements.
Security accessories may be added if they can be installed without damaging structural components, roof panels, weather seals or electrical safety. Freestanding or externally supported devices can avoid unnecessary drilling. For wired equipment, use a qualified electrician where required and follow local electrical codes. Check the shed manual before making permanent holes or modifications.
The shed itself should be installed on a flat, level and properly prepared base. If your yard slopes, the site normally needs to be leveled or a suitable platform or foundation built before assembly. Do not try to compensate for a slope by twisting or forcing the shed structure. Follow the foundation requirements for your specific model.
Usually this should be avoided unless the responsible authority specifically allows it. Septic systems, utility easements and similar areas may need ongoing access and can have load, setback or excavation restrictions. Check your property records and local requirements before preparing a foundation or placing a shed in these areas.
Avoid placing a shed or permanent foundation where it blocks access to irrigation lines, drains, utility lines or other buried services. Before digging, anchoring or pouring concrete, identify underground utilities and comply with local utility-marking requirements. Plan the location so future repairs can be made without dismantling the shed whenever possible.
Only use attachment points and fasteners that are appropriate for the construction of your specific shed. Avoid drilling into wall panels, roof panels or structural members unless the installation instructions permit it. For heavier items, floor-supported shelving or racks are usually the safer choice. If you are unsure, check the manual or contact DuraMax Support before making permanent modifications.
Possibly, but the platform must be flat, level, properly supported and capable of carrying the combined weight of the shed, its foundation or floor system and everything stored inside. Elevated platforms may also have code, guard, setback or anchoring requirements. If you are unsure about the structure below the shed, have the platform reviewed by a qualified contractor or building professional before installation.
A compacted gravel area can be part of a suitable shed base, but the shed should not be placed on loose or uneven material unless the installation instructions for that model specifically allow it. Many sheds still require a level platform, foundation frame, pavers or concrete surface over the prepared gravel. Follow the foundation requirements for the exact model and make sure the base will stay level and drain properly.
Solar lighting may be a practical option if it can be installed without compromising the shed roof, wall panels, weather sealing or structure. Avoid drilling or fastening into structural components unless the product instructions allow it. For roof-mounted panels or heavier equipment, confirm the added load and attachment method with DuraMax Support or a qualified installer before proceeding.
Some owners may want to add insulation, but whether that is appropriate depends on the shed construction and the way the walls and roof are designed. Do not cover required vents, trap moisture or add weight to structural components without confirming the method is suitable for your model. If insulation is important, contact DuraMax Support before modifying the shed so you can avoid interfering with ventilation, drainage or warranty requirements.
Many DuraMax sheds are designed so the doors can be secured with a customer-supplied padlock or other compatible locking method, but the exact hardware varies by model. Check the product page and installation manual for the specific shed. A shed lock can discourage casual access, but outdoor storage buildings should not be treated as high-security safes for irreplaceable valuables.
It may be possible to relocate some sheds, but moving a fully assembled shed can damage panels, fasteners, the foundation or the structure if it is not designed to be moved that way. In many cases it is safer to partially disassemble the shed or follow a model-specific relocation method. Review the installation manual and contact DuraMax Support before attempting to move an assembled shed.
A shed can be installed near trees if the site is suitable, but consider falling branches, roots, sap, leaves, shade, drainage and future tree growth. Keep enough clearance to assemble and maintain the shed, and avoid locations where unstable limbs or tree roots could damage the structure or foundation. Regularly remove leaves and debris from the roof and around the base.
Most sheds should not be placed directly on unprepared grass or soil. A flat, level, stable and well-drained base helps the doors operate correctly and helps prevent movement, settling and moisture problems. The approved base or foundation varies by model, so follow the installation manual for the exact shed you are installing.
Routine cleaning is best done with water, a mild household detergent and a soft cloth, sponge or brush. High-pressure washing can force water into seams, vents or openings and may damage finishes or components, so avoid aggressive pressure washing unless the instructions for your specific model say otherwise.
Door orientation and swing are model-specific. Some sheds allow limited configuration choices, while others are designed with a fixed door location and opening direction. Do not assume the doors can be reversed. Check the product images, dimensional drawing and installation manual for the exact model before ordering or planning the site.
Yes. Reviewing the installation manual before purchase is a good way to understand the foundation requirements, assembly sequence, tools, anchoring, clearances and model-specific details. Use the Installation & Parts Guide on the DuraMax website or the manual linked from the product page when available. Make sure you are viewing the manual for the exact model you are considering.
No. Do not stand, sit or walk on the shed roof unless the product documentation specifically states that it is designed for that purpose. Roof panels and framing are intended to support the loads specified for the shed, not people. Use a properly positioned ladder when cleaning or inspecting the roof and follow normal ladder-safety practices.
Possibly, if the equipment fits through the door and the floor or foundation is suitable for its weight. Follow all fuel, battery and equipment-manufacturer storage instructions and local fire-safety requirements. Do not run an engine inside the shed, and avoid storing fuel or other flammable liquids in a way that creates a fire or vapor hazard.
Large equipment may fit if the shed has enough interior floor space, door clearance and a suitable floor or foundation for the weight. Compare the equipment’s overall width, height and turning space with the shed’s actual interior and door-opening dimensions. Also consider whether a ramp is needed and whether the floor system is appropriate for concentrated loads.
Outdoor sheds are not climate-controlled spaces, so temperature and humidity can fluctuate. Sensitive items such as electronics, paper records, fabrics, photographs or valuables should be placed in suitable sealed containers and kept off the floor where appropriate. If an item requires a controlled temperature or humidity range, indoor conditioned storage is generally the better choice.
Storage rules for gasoline, propane cylinders, solvents and other flammable or hazardous materials depend on the product, container, ventilation and local fire code. Do not assume an outdoor storage shed is automatically suitable for these materials. Follow the manufacturer instructions for the material being stored and any applicable local requirements, and keep ignition sources away.
Yes, but the safe load depends on the floor or foundation system used with your specific shed. Heavy items should be placed on a properly supported floor and distributed so they do not overload one small area. Freestanding shelving is often preferable for heavier storage. Do not attach heavy loads to wall panels or structural members unless the installation instructions specifically allow it.
DuraMax storage sheds are designed for storage and similar accessory uses, not as habitable living or sleeping spaces unless a specific product is expressly designed, approved and permitted for that use. Converting a storage shed into living space can involve structural, electrical, insulation, ventilation, fire-safety and building-code requirements. Check local regulations and use a product intended for occupancy if that is your goal.
Portable climate-control equipment may be possible in some situations, but a standard storage shed is not designed as conditioned living space. Any electrical equipment must be installed and operated safely, with adequate ventilation and clearance from combustible materials. Follow local electrical requirements and do not cut structural or weather-sealing components unless specifically permitted for your model.
A ramp can be useful for lawn mowers, bicycles and wheeled equipment, but the correct setup depends on the shed threshold, floor system and foundation. Use a ramp that is stable, properly supported and suitable for the weight being moved. Do not drill into or alter the shed structure unless the product instructions specifically allow it, and make sure the ramp does not interfere with door operation or drainage.
A DuraMax shed can provide useful storage and workspace, but it is not automatically designed or approved as an occupied building. If you plan to use it regularly as a workshop, consider ventilation, lighting, electrical service, floor loading, tool safety and local code requirements. Avoid structural modifications unless they are specifically permitted for the model.
It can on some installations, but the foundation dimensions and drainage details should follow the manual for the exact model. A slab that extends beyond the walls can collect or direct water toward the shed if it is not properly sloped and sealed. Make sure the finished base supports the shed correctly and does not create standing water around the perimeter.
Permit, setback and HOA requirements vary by city, county and community. Before ordering or preparing a foundation, check with your local building department and, if applicable, your homeowners association. Requirements can depend on shed size, height, location and whether utilities will be added. DuraMax product dimensions and installation manuals can help you provide the information they may request.
Registration requirements can vary by product and warranty program. Keep your proof of purchase, model number and product labels whether or not registration is required. Review the warranty document supplied with your shed or the current warranty information on the DuraMax website to confirm any registration or claim requirements for your model.
Anchoring is an important part of proper shed installation and may be required by the installation manual or local code. The correct anchoring method depends on the shed model and the base beneath it, such as concrete, wood or another approved foundation. Always follow the model-specific installation instructions and use hardware appropriate for the foundation.
Ventilation helps reduce heat and moisture buildup inside an outdoor storage shed. Many models include vents or ventilation features as part of the design. Keep those openings unobstructed and do not cover or remove them unless the product instructions specifically allow it. If you plan to store moisture-sensitive items, allow for air circulation and avoid introducing unnecessary moisture into the shed.
Condensation can occur when warm, moist air meets cooler surfaces. Good site drainage, proper assembly, keeping vents unobstructed where provided and avoiding excessive moisture inside the shed can help. Do not block ventilation openings or make unapproved structural modifications. If condensation is persistent, check for drainage or sealing issues and review the installation manual for your model.
Start with what you plan to store, then allow extra room for access and future storage. Compare the shed’s interior dimensions, door opening and exterior footprint, not just the advertised nominal size. Large equipment such as bicycles, lawn mowers or yard machines may require a wider door opening and more turning space inside the shed.
Start by reviewing the warranty for your exact model and gathering the model number, proof of purchase, photos and a clear description of the issue. Do not discard affected parts until the claim has been reviewed. Contact the retailer or DuraMax Support as directed by the applicable warranty so the correct next steps, documentation and replacement-part options can be determined.
A standard outdoor storage shed is not climate controlled, so the interior temperature can rise or fall with outdoor conditions and sun exposure. Ventilation, shade, shed material, color and local climate all affect interior temperature. Do not assume the shed will protect temperature-sensitive belongings the same way a conditioned indoor room would.
Good drainage is important for helping protect the foundation, floor system and stored items. Choose a site where water will not collect around or beneath the shed, keep soil and mulch from building up against the walls, and maintain a slight grade away from the structure where practical. If your site has recurring standing water, correct the drainage problem before installing the shed.
Very level and square. An uneven or out-of-square base can make wall panels, roof components and doors difficult to align and can place unnecessary stress on the structure. Check the foundation in multiple directions with a level and compare diagonal measurements before assembly. Correct the base rather than trying to force the shed to fit an uneven foundation.
The number, dimensions and weight of cartons vary by shed model. Check the product specifications, packaging information or retailer listing for the exact model before delivery. Larger cartons may require more than one person or suitable handling equipment, so plan how the shipment will be moved and stored before it arrives.
Leave enough space around the shed for assembly, anchoring, drainage, door operation and future maintenance. The exact clearance depends on the model and your site. Also check local setback rules for fences, property lines and other structures. Review the product dimensions and installation manual before finalizing the location.
Inspect the shed periodically and after severe weather. Look for loose fasteners, movement at anchors, door alignment, damaged seals or panels, blocked vents and changes in the foundation. The appropriate frequency depends on climate and exposure, but a seasonal inspection and an additional check after major storms is a practical approach.
For routine cleaning, use water, a mild household detergent and a soft cloth, sponge or brush. Avoid harsh solvents, abrasive cleaners or aggressive pressure washing unless specifically approved for your model. Periodically inspect the roof, doors, vents, anchors and foundation area, and keep leaves, soil and standing water away from the shed.
Use the snow-load rating for your exact shed as the guide and do not allow unusually heavy or uneven snow accumulation to remain on the roof. If snow needs to be removed, work from the ground with a suitable roof rake or another safe method that does not require standing on the shed. Avoid sharp tools that could damage panels, and follow the product instructions for your model.
Complete the required foundation or base, confirm that it is flat, level, square and properly drained, and make sure the installation area has the clearances required by the manual. Check for underground or overhead utilities before digging or anchoring, organize the cartons and hardware, gather the required tools and helpers, and choose suitable weather for assembly.
Keep the packaged shed dry, protected and stored in a stable location until you are ready to assemble it. Follow any carton-orientation or stacking instructions shown on the packaging and avoid leaving boxes where standing water, traffic or weather can damage them. Before assembly, inspect the cartons and compare the contents with the installation manual.
Exact exterior height varies by model. Use the product specification or dimensional drawing for the measurement from the base to the highest point of the roof, then compare it with any HOA, zoning or building-code limits that apply to your property. Some jurisdictions measure height differently, so confirm the local rule before ordering or preparing the site.
Plywood is not included with every DuraMax shed or foundation kit. Some models use an integrated floor, while others require a separate floor surface or plywood installed over a compatible foundation system. Check the product page and installation manual for your exact model before purchasing flooring materials.
Sealing requirements vary by model and foundation type. Some installations may call for sealant in specific locations, while others rely on proper panel overlap, flashing or foundation preparation. Follow the installation manual for your exact model rather than applying sealant broadly, since blocking drainage paths or ventilation can create other problems.
Wind and snow ratings vary by product series and model. Use the rating shown on the product page, specification sheet or installation manual for the exact shed you are considering. Local building requirements may be different from the product rating, so confirm applicable code requirements for your location before installation.
Keep your proof of purchase, model number, product and carton labels, installation manual and any warranty or registration information. Photos of the completed installation and foundation can also be useful. These records can make it much easier to identify replacement parts, locate the correct manual or request warranty and product support later.
Included components vary by model. The shed kit normally includes the parts listed in the product specifications and installation manual, but items such as plywood, anchors, sealant, shelving, ramps, electrical materials or optional accessories may be sold separately. Review the carton contents and the manual for your exact model before beginning site preparation or assembly.
Before delivery, confirm the shipping method, carton dimensions, delivery access and where the packaged shed can be safely placed. Make sure gates, driveways or other access points are wide enough for the shipment and that someone can receive it if required. The installation site and foundation do not necessarily need to be complete before delivery, but the cartons should be stored flat, dry and protected until assembly.
First compare the part with the installation manual and inspect it for shipping damage. Do not force a damaged or badly distorted component into place. Some materials may relax after being stored flat in appropriate conditions, but if a part appears damaged or will not fit as shown in the manual, photograph it and contact the retailer or DuraMax Support with the model and part information before continuing assembly.
Inspect the damage and avoid temporary repairs that could interfere with structure, drainage or weather sealing. Record the model number and part location, take clear photos and contact DuraMax Support to determine whether a replacement component is available and what repair method is appropriate. Do not use unapproved adhesives, screws or patches on structural or roof components without guidance.
If the foundation settles, shifts or becomes uneven, address the base before the problem affects doors, wall alignment or roof fit. Remove stored weight if needed, identify the cause of the movement, and re-level or repair the foundation using an appropriate method for that base type. Do not try to correct a foundation problem by forcing the shed frame or doors into alignment.
Before assembly, compare the cartons and parts with the installation manual and inspect components for shipping damage. If something is missing or damaged, keep the model number, part description and proof of purchase available and contact the retailer or DuraMax Support before modifying or substituting parts. Photos of the carton label and damaged component can also help speed up support.
Door alignment problems are often a sign that the foundation or floor is not level and square, or that the structure needs to be rechecked during assembly. Confirm the base is level, verify that wall and roof sections are seated correctly, and review the fastening sequence in the installation manual. Avoid forcing the doors or permanently modifying hinges or panels until the underlying alignment issue is identified.
First check that the shed is sitting on a level, properly drained base and that all roof, wall, door and sealant steps were completed according to the installation manual. Look for blocked drainage paths, missing fasteners, gaps or damaged components. Avoid adding unapproved sealants or modifications until you identify the source. If the cause is not obvious, contact DuraMax Support with photos of the affected area and your model number.
After severe weather, inspect the shed from the ground for loose or damaged panels, doors, roof components, anchors and foundation movement. Do not climb on the roof. If anything appears shifted, cracked or loose, stop using the affected area until the installation manual or DuraMax Support can help you determine the proper repair or replacement steps.
Use the foundation or slab dimensions specified for the exact shed model rather than relying only on the advertised nominal shed size. The base should be flat, level, properly drained and sized so the shed can be assembled and anchored as shown in the installation manual. Check the dimensional drawing or manual before pouring concrete or building a platform.
Required tools vary by shed series, but common assembly tools may include a drill or driver, screwdrivers, measuring tape, level, ladder, rubber mallet and basic hand tools. Some models may also require sealant or foundation tools. Check the installation manual for your exact model before beginning so the site, tools and helpers are ready.
The model number is typically shown on the product packaging, carton label, installation manual, order confirmation or retailer listing. Keep the model number and purchase information with your records because they are useful when requesting replacement parts, manuals or warranty support. If you cannot locate it, DuraMax Support may be able to help identify the product from photos and dimensions.
A properly assembled shed can help limit pest entry, but no outdoor storage building should be considered completely pest-proof. Keep doors closed, maintain the foundation and surrounding area, avoid storing food or pet food in open containers, and seal only gaps that can be closed without interfering with drainage or ventilation. If you have a persistent pest problem, use appropriate pest-control measures for your location.
Measure the widest and tallest point of the item you plan to store, including handlebars, attachments, mirrors or other projections, and compare those measurements with the exact clear door-opening dimensions for the shed. Do not rely only on the shed’s nominal width. Also allow enough interior space to turn and position the equipment once it is through the doorway. Check the product page or dimensional drawing for the model you are considering.
Outdoor materials naturally age with sun and weather exposure, and the amount of color change can vary by material, finish, climate and orientation. DuraMax exterior products are designed for outdoor use, but no exterior finish should be expected to look completely unchanged forever. Keep the surface clean, avoid harsh chemicals, and review the warranty for any model-specific coverage related to materials or finish.
Delivery service varies by retailer, carrier and order. Oversized shed shipments are often delivered to a curb, driveway or other carrier-accessible location rather than carried into a backyard or placed on the foundation. Confirm the exact delivery service, liftgate or tailgate arrangements and any additional charges with the seller before the shipment arrives.
Measure the narrowest gate, walkway, turn and other access points before delivery. The packaged carton dimensions can be different from the assembled shed dimensions, so compare your access route with the packaging dimensions for the exact model. If the cartons are too large for the intended path, plan a safe alternate route before delivery.
No matching answers found
Try a different search term, browse another topic, or contact our support team for help.